How to install solid Wood Countertops
GLULAM AND LIVE EDGE SLAB
The natural beauty of solid wood countertops accentuates the interior space of your home. If you favor the rustic look of a natural wood slab, The Wooderra's live edge wood slab is a great option. If you are looking for a cleaner look, with more uniform edges and angles, our glulam countertops are an elegant choice for your kitchen.
This article offers some installation tips to help you achieve a professionally installed solid wood countertop, adding warmth as well as value to your kitchen in a matter of hours. The installation of glulam and wood slab materials is similar, and both provide you with functional and charming countertops. We will guide you through the basic woodworking techniques so you have an affordable and enjoyable option.
Establish the end goal
• Our end goal is to show how to install a solid wood countertop that has some horizontal movement with very little to no vertical movement. The solid wood countertop installation that allows the wood to expand and contract with changes temperature and humidity changes in the in the weather. When the temperature goes down in the winter or goes up in the fall or summer, your solid wood countertop, either made of glulam or wood slabs will grow and shrink in size.
A visually pleasing solid wood countertop that has a good working surface, however it can be a strictly ornamental feature in the interior space if desired.
A few things about the wood you choose
• Choosing your wood is always the first step in any project. Many types of wood can offer different aesthetic effects and specific surface performance characteristics. Solid hardwood is highly recommended as it will stand up to daily activities and still maintain its natural beauty. Solid hardwood also offers the warmth of an organic material, which is what synthetic materials like granite or quartz cannot provide.
• The standard measure of the countertop should be about 1-1/2" thick and no less than 1-1/4". In other words, 8/4 stock should be an adequate option. Squaring, removing any cup, bow or wind will be less stressful when you make use of an 8/4 stock, especially if you are dealing with materials of longer length. Depending on the project, it can vary.
• Select quality wood boards by searching for the ones that are free of large defects. Knots or cracks are undesirable as they may open up over time and create a perfect place for water and bacteria to reside. Water and bacteria are both harmful intruders to solid wood materials. Our expert team can advise you on choosing the one that is right for your personal space.
• Glulam countertops should be made of boards that have a width of around 6" or less. The higher number of boards conjoined together, the greater the stability your finished countertop will have.
• We can provide a nice slab specifically cut for your project. You should opt for 2" thick minimum, as a much thinner slab can result in warping. For instance, if a countertop with 2" thickness is desired, start out with 2.5" rough sawn slab. You can choose a wood slab with a raw finished top, depending on your taste. The bottom line is to make sure you first decide on the finished dimensions for the solid wood countertop and add a few inches to both the width and length. This will allow for any adjustments to be easily accommodated later.
Installation basics
• Your solid wood countertop would need a sturdy surface to rest on. On most cabinets that don't have any tops, an installation of blocking is necessary to provide support. On solid-topped cabinets, thin furring strips can be added to raise the top enough for air circulation underneath.
• In either case, you should affix your glulam boards or wood slab to the cabinets using a flexible kitchen and bath sealant. Screw it down to the framework securely while still allowing the natural expansion and contraction of the wood. We will discuss this matter later in this article. Let's move on to templates.
Templates
It is advisable to use templates to get the solid wood countertop to fit right especially where the installation is joined to walls or other structures.
Templates are designed to reduce error and maximize the chances of your glulam countertop will fit unusual angles, uneven walls, or rough surfaces. You can save on labor and costs by taking the measurements and making your own template and sending it to the manufacturer. They will make your glulam countertop according to your specifications, and deliver it with the glulam boards already jointed and glued together, ready for installation.
Templates are not necessary for island and some peninsula projects.
Some notes on making templates
• Should be made of hardboard, chipboard, or non-shrinking card that transfers to the exact measurement of the solid wood countertop.
• Avoid overlapping templates
• Mark the templates with readable and well-defined front and rear edge symbols
• Indicate the position of any sink, knife block, or stove top if available on the cabinet situated below
• Indicate the center line for all integrated items and cut-outs (granite inserts, sinks, etc.)
What to do when the materials are brought home
• Allow acclimatization: Let the wood acclimatize to your home environment for at least a day or two before working with it.
• If you are cutting or planing the glulam boards, leave an extra 1/8" in thickness for levelling. To achieve a square look on all four sides, mill them squarely while working on a flat surface. Don't forget to keep an eye on the color and grain and make sure they go with the square shape. When the individual glulam boards are formed to be as flat and square as possible, matching and gluing will be much less complicated.
• When it comes to wood slab, you would want not to mill the sides if you want to retain the live edges as the star of the countertop. If you do want to mill them, the result will be a solid wood countertop made of straight edge slab which is exceptionally beautiful in its own way.
• Arrange the glulam boards to your preference and mark the position of each individual board. The boards can be joined using a jointer. If a seamless joint is desired, opt for a hand-plane to remove the machine marks left on the edges. To keep the faces remaining flush during the application of adhesive, add a few biscuits along the edge of the glulam board.
• Time to glue the glulam boards together. Use a waterproof glue, like Titebond III or G2 epoxy for large glue-ups. Place a parchment paper under the glued joint as this will help keep the glue away from your clamps.
Attach the countertop to the cabinet
Now that you have your glulam boards jointed together or a piece of wood slab that stock to the intended measurement and are arranged nicely:
• Start by securely fastening the top to the base unit by using appropriate length wood screws. Corner blocks are installed in within most cabinets with the purpose of attaching the solid wood countertop to the cabinet base.
• Pre-drill pilot holes through the corner block into the underside of the countertop. Do not drill through it.
• As we discussed earlier, remember not to mount the countertop directly to the cabinet or base unit and to allow a 1/16" space for air circulation between the countertop and the solid-topped base. To add a gap for airflow, place 4 washers, one in each corner before mounting. This will help eventually get rid of chances of the countertop cracking, warping, and delaminating.
• Wood is a hygroscopic material, meaning it continues to expand and contract throughout its existence. This is why some cabinets are designed with slotted screw holes. Find the screws in the slots' center. If you don't find that such a design on your cabinet, use an undersized screw with a washer. The screws with washers should be in the center of the holes for the countertop to be secured.
• After measuring and laying it out on the cabinet, proceed with sanding the surface with an orbital sander. This is applied to both glulam and slab. Start with 60 grit, increase to 80 and move to 100, gradually work up to 150 and 180. You can then finish with 200 or 220, depending on how smooth you want the surface to look and feel. If you don't have a sander, hand-sanding also works.
• To accommodate the countertop's movement, epoxy an oversized washer with a ½" center to the cabinet supports' underside. Then proceed by drilling out the center. Seasonally, a standard solid wood countertop could move 3/8".
Installation tips:
• Remember to pre-drill the holes
• Remember not to over tighten the screws so as to allow the natural movement of the solid wood countertop.
• Wherever the countertop does not rest properly on a cabinet, support it with strips of wood
• If your countertop contains multiple glulam boards, double check the corner fittings to ensure they are tightened after the countertop has been installed.
• After sizing and fitting the glulam countertop correctly, if you want to add an edge profile, make the necessary adjustments to the front overhang.
Tips for applying finish
• After sanding is done, clean work area so that it is as dust-free as possible. Use a soft cotton cloth or vacuum brush attachment.
• To find out if there are any imperfections, wipe the entire solid wood countertop's surface with a clean cotton cloth and mineral spirits. This will allow sanding marks or excess filler that has not been sanded away to show. Fix any defects found, and clean the dust again.
• Before applying finish, allow dust to settle for a few minutes.
• Thoroughly follow the instructions to apply finish.
• If food prepping and cutting will be done on the solid wood countertop, go for food-safe oil like mineral oil or hemp. Don't apply traditional polyurethane as it will not absorb into the surface and will bubble over time. A marine finish applied on yachts and sailboats can be used for even more durable and water-proof finish. <
• It is essential to finish both sides
• Apply no less than four coats to the top and three coats to the underside.
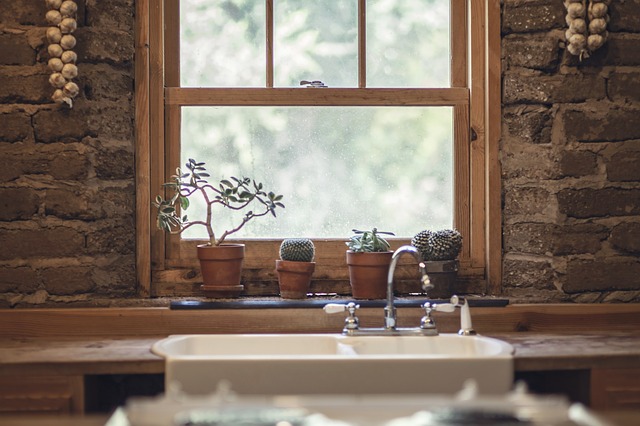
Faucet and sink openings
• This could be your last step. Using the manufacturer's sink template or the template you have made earlier, outline the sink's position and cut along the line using a jigsaw.
• If an under mounted sink is desired, transfer the template to a ¼" piece of MDF (Medium Density Fiberboard)
• Carefully position and clamp the guide template to the countertop's surface. Rout along the guide with a plunge router fitted with a shank-side bearing flush trim bit and allow bit to ride along template until you have reached the other side. You can use the template for the entire sink hole or just corners.
• Take your time and remove the material with only 1/8" – ¼" increments
• Clean the shavings after each pass
• Add a bead of silicon caulking while installing sink and the faucet.
Leave Reply